遮荫导航
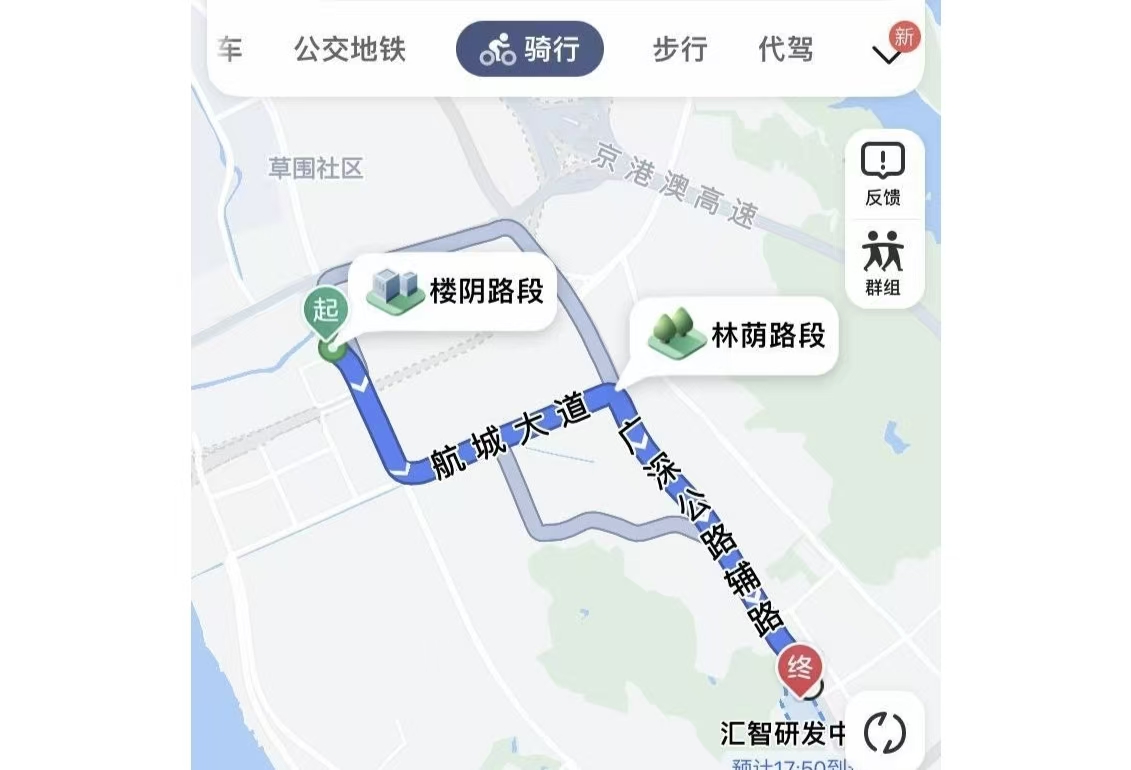
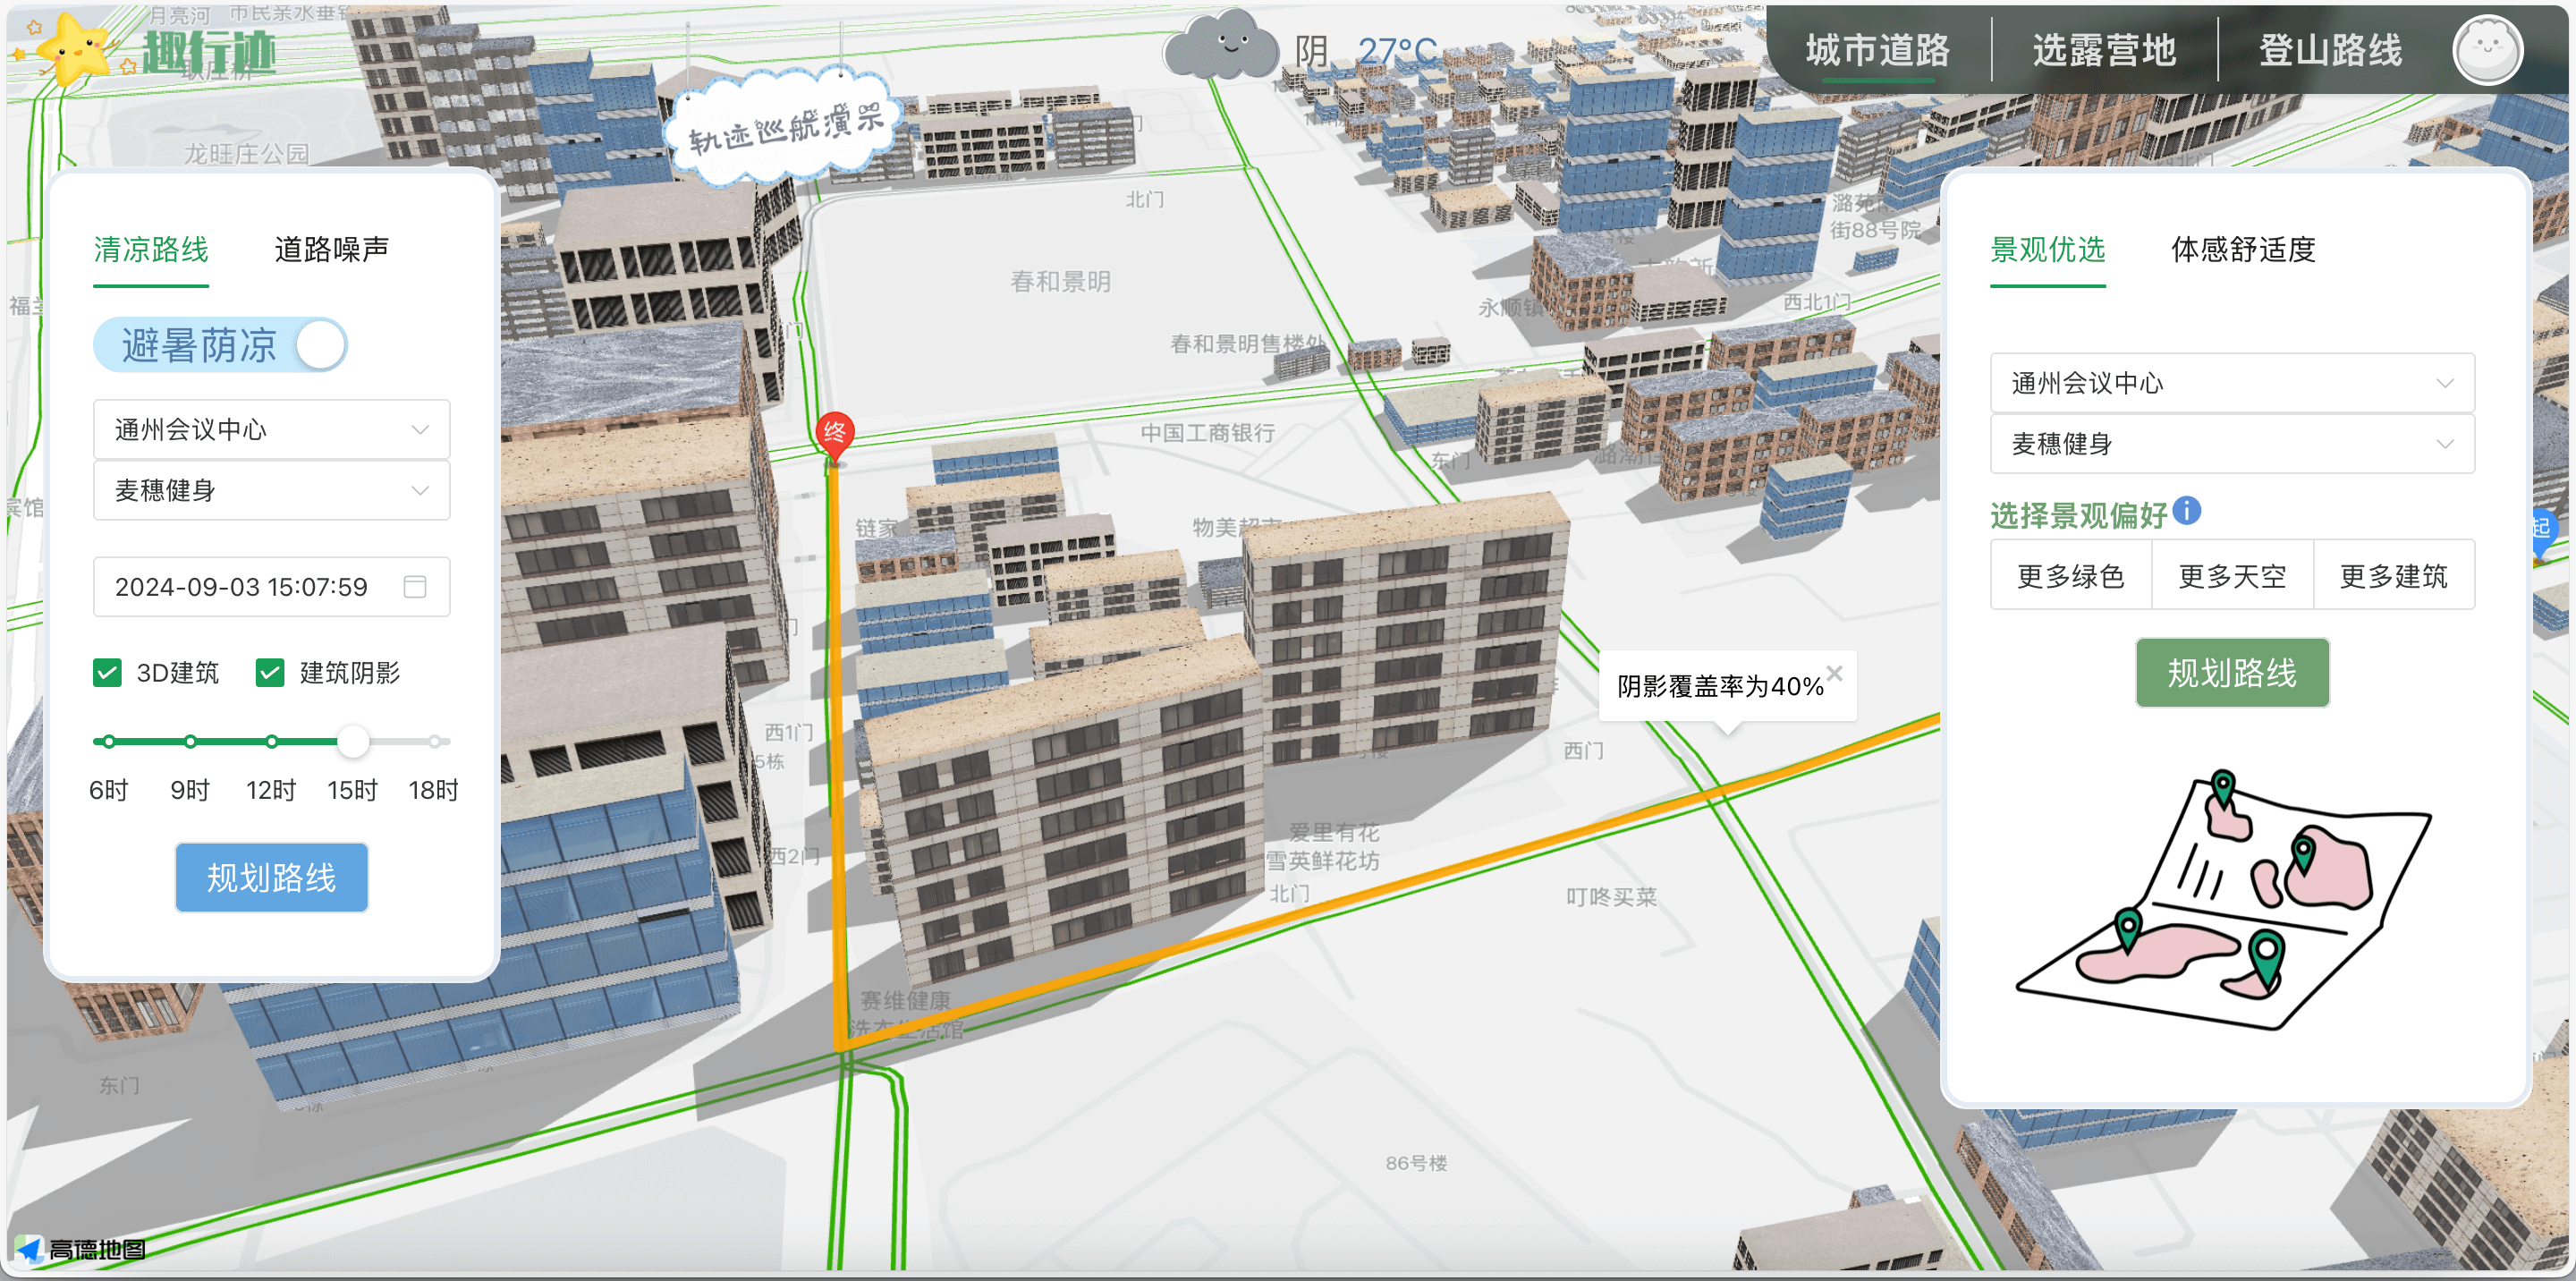
2022年8月,高德地图面向骑行和步行用户正式上线“防晒导航”,致力于通过动态光影跟踪等先进技术,实时计算特定时段内覆盖道路的阴影面积,为用户提供更清凉的出行体验。
其核心思路是:在常规路径规划的基础上,引入动态光影计算,将道路两侧建筑物和树木所产生的阴影纳入考虑,从而为用户推荐更多被遮蔽的荫凉路线。这一方法突破了传统导航只依赖距离与时间的限制,让路线选择更符合夏季用户的实际需求。
本文只针对**“基于建筑阴影的路网权重 + 最短路径”这一技术环节做实现记录: 以北京通州区一小块区域为例,输入建筑矢量与路网**,根据给定时刻的太阳方位角(azimuth)与高度角(altitude),推导每栋建筑的阴影投影,求出每条路段与阴影相交长度,把这段长度作为“阴影指标”写入 NetworkX 图的边属性,最终通过 nx.shortest_path 在两种策略里选路:
实现思路
数据准备:建筑与路网
建筑矢量数据预处理
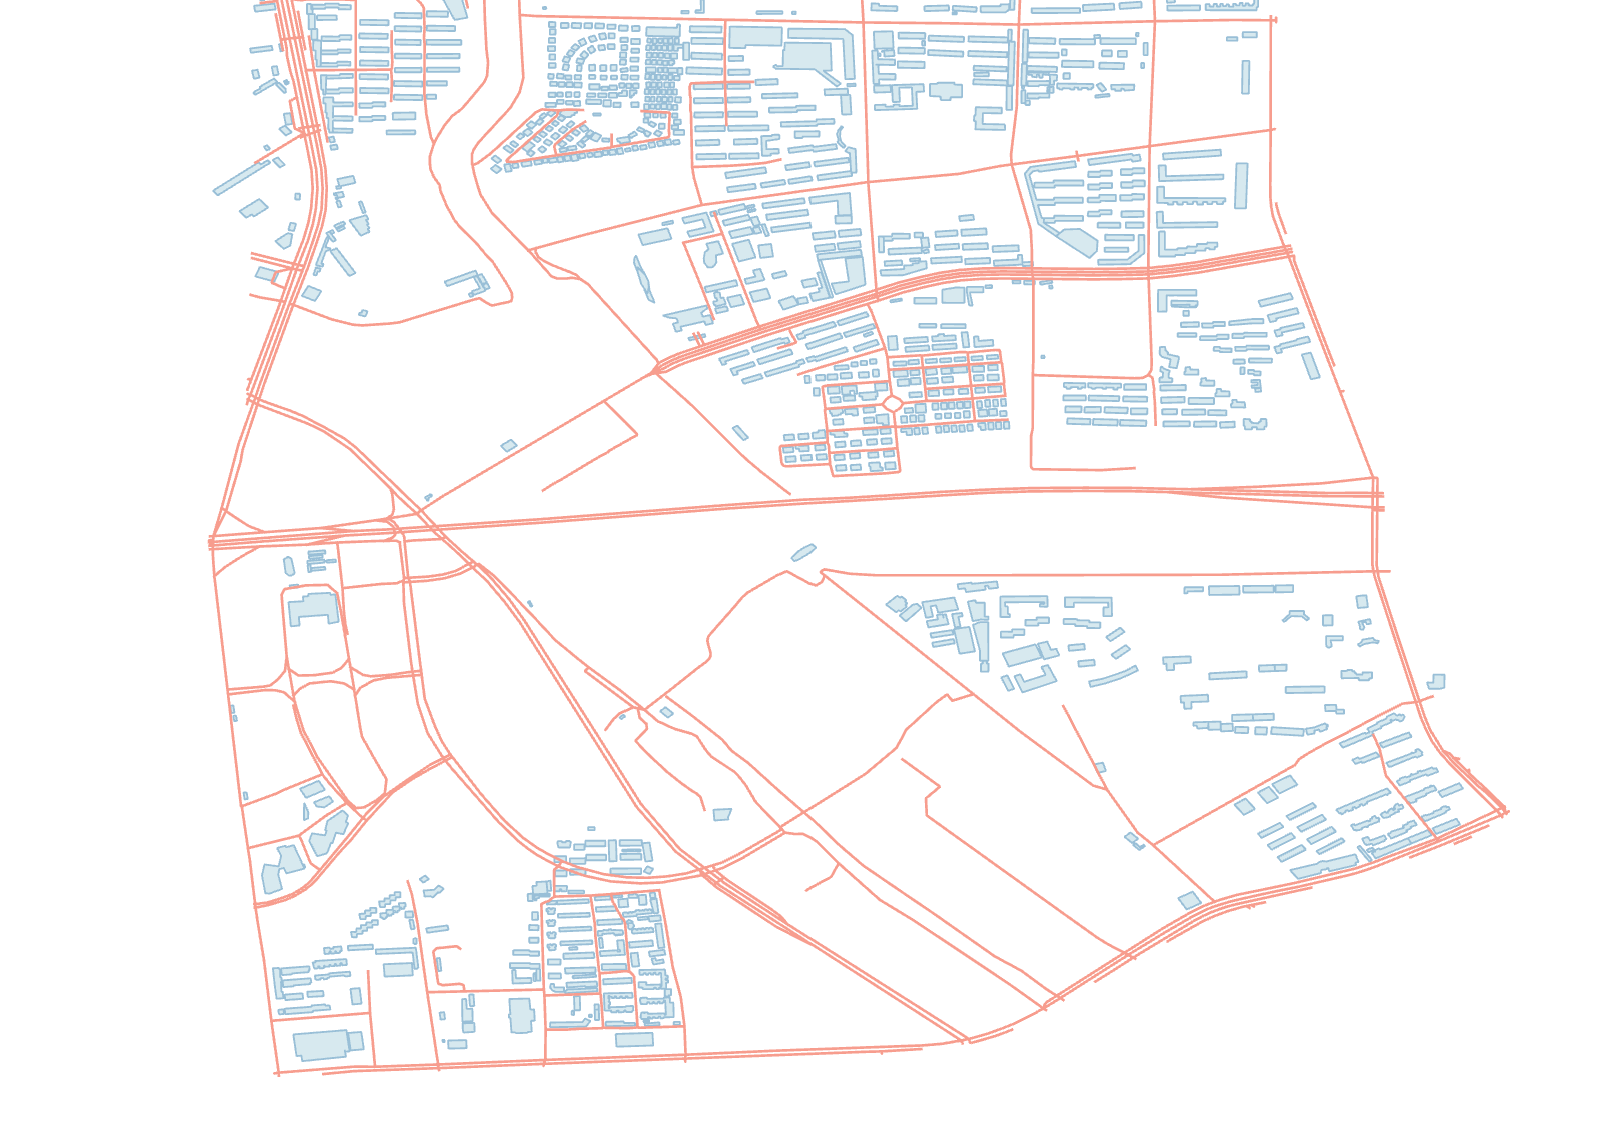
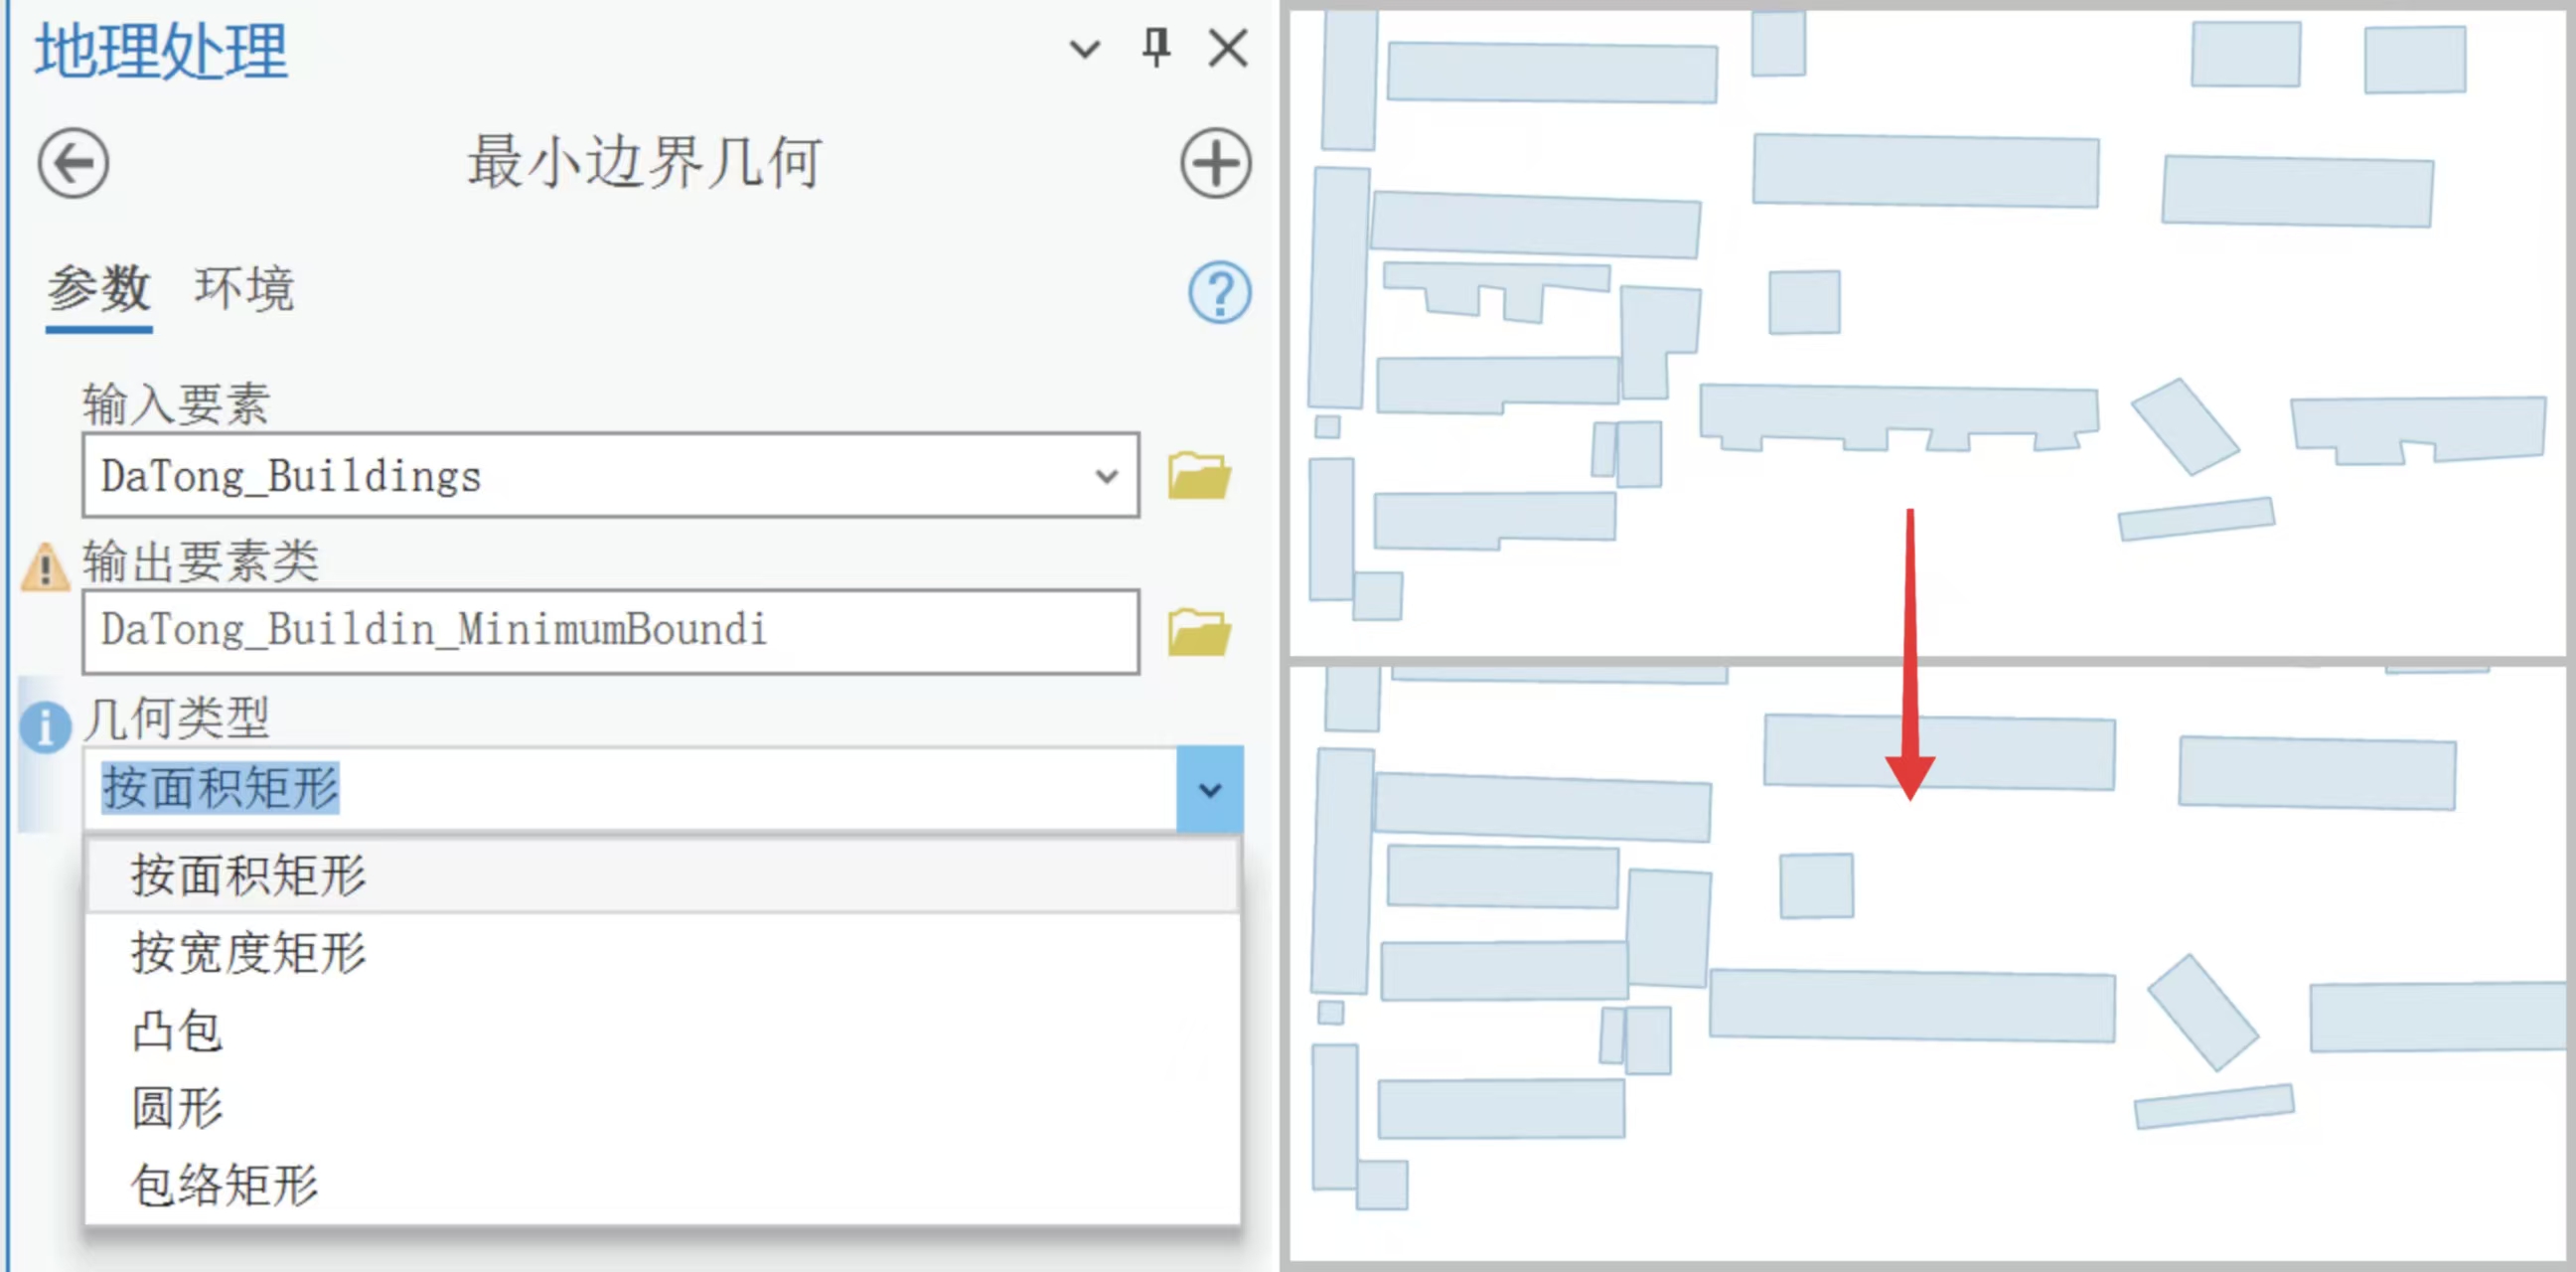
遮阴路线的核心数据来源有两部分:建筑物轮廓和景区道路。为了避免复杂的几何影响效率,我先对建筑矢量数据做了简化处理。原始建筑往往是带有凹凸细节的多边形,直接用来投射阴影会带来很大计算量,于是我用 ArcGIS Pro的**最小边界几何(Minimum Bounding Geometry)**工具生成矩形外包框。这样既保留了建筑的大致形态,又降低了顶点数量,后续计算更快。
加入建筑和路网数据
每栋建筑最终存储为“矩形四点坐标 + 高度”的结构,导出成 JSON,路网数据来自裁剪后的 Shapefile 文件。
1
2
3
4
5
6
7
8
9
10
with open ('json/TongZhou_Buildings.json' , 'r' ) as buildings: buildings_data = json.load(buildings) buildings_rect = [] for d in buildings_data: lng_lat = d.get('coordinate' ) height = d.get('height' ) buildings_rect.append((lng_lat, height))
太阳几何与建筑朝向
阴影的方向与长度取决于太阳的方位角(azimuth)和高度角(altitude)。公式很直观:阴影长度 L = H / tan(altitude),其中 H 是建筑高度。为了计算方便,我在小范围内把“米”近似换算到经纬度尺度。做法是:把建筑矩形整体沿着太阳方向平移一个距离 L,然后和原矩形拼接,形成一个六边形阴影多边形。拼接顺序依赖于矩形主方向与太阳方向的夹角,避免出现交叉错误。
1 2 3 4 5 6 7 8 9 10 11 12 13 14 15 16 17 18 19 20 21 22 23 24 25 26 27 28 29 30 31 32 33 34 35 36 37 38 39 40 41 42 43 44 45 46 47 48 49 50 51 52 53 54 55 56 57 58 59 60 61 62 63 64 65 66 67 68 69 70 71 72 73 74 75 76 77 78 azimuth = 141.29097 altitude = 40.59453 angle_horizon = 128.70903 def get_bounding_rect (rect_coords ): """ 估算矩形主方向角:取第0与第1顶点连线方向(度) rect_coords: [(x0,y0), (x1,y1), (x2,y2), (x3,y3)] """ (x1, y1) = rect_coords[0 ] (x2, y2) = rect_coords[1 ] theta = math.atan2(y2 - y1, x2 - x1) return math.degrees(theta) def get_shadow_rect (building, angle_horizon, angle_vertical ): """ 输入:building = (rect_coords, height_m) 输出:阴影多边形顶点序列 步骤: 1) 用 L = H / tan(alt) 估算阴影长度(米→度做近似换算); 2) 将矩形四点整体沿太阳方向平移 (dx, dy); 3) 根据矩形主方向与太阳方向的夹角区间,确定六边形拼接顺序。 """ rect_coords, height_m = building rect_height_deg = lng_km2degree(height_m / 1000.0 ) L = rect_height_deg / math.tan(math.radians(angle_vertical)) dx = L * math.cos(math.radians(angle_horizon)) dy = L * math.sin(math.radians(angle_horizon)) rect_rotate = get_bounding_rect(rect_coords) shadow_rect_points = [(x + dx, y + dy) for (x, y) in rect_coords] angle_diff = angle_horizon - rect_rotate if angle_diff < 0 : angle_diff += 360 if angle_diff > 360 : angle_diff -= 360 if 0 <= angle_diff <= 90 : shadow_polygon = [ rect_coords[1 ], shadow_rect_points[1 ], shadow_rect_points[2 ], shadow_rect_points[3 ], rect_coords[3 ], rect_coords[2 ], ] elif 90 <= angle_diff <= 180 : shadow_polygon = [ rect_coords[0 ], rect_coords[3 ], rect_coords[2 ], shadow_rect_points[2 ], shadow_rect_points[3 ], shadow_rect_points[0 ], ] elif 180 <= angle_diff <= 270 : shadow_polygon = [ rect_coords[0 ], rect_coords[3 ], shadow_rect_points[3 ], shadow_rect_points[0 ], shadow_rect_points[1 ], rect_coords[1 ], ] else : shadow_polygon = [ rect_coords[0 ], shadow_rect_points[0 ], shadow_rect_points[1 ], shadow_rect_points[2 ], rect_coords[2 ], rect_coords[1 ], ] return shadow_polygon
逐楼生成阴影并合并
为每栋建筑生成阴影多边形后,使用 shapely.unary_union 做一次性拓扑合并,得到统一的阴影几何(MultiPolygon的并集)。后续与路段相交长度的计算只需与该统一几何体相交即可,避免逐栋求交的性能开销。
1
2
3
4
5
6
7
8
9
shadow_polys = [] for b in buildings_rect: shadow_coords = get_shadow_rect(b, angle_horizon, altitude) poly = Polygon(shadow_coords) if poly.is_valid: shadow_polys.append(poly) shadow_unions = unary_union(shadow_polys)
读取路网并做坐标系转换(WGS84 → GCJ-02)
由于前端基于高德地图(GCJ-02),为了消除前后端叠置误差,建议在后端对路网坐标做 WGS84→GCJ-02 转换。可以借助Python的coord_convert库。
1 from coord_convert.transform import wgs2gcj
1 2 3 4 5 6 7 8 9 10 11 12 13 14 15 16 17 18 19 20 21 22 23 roads = gpd.read_file("shp/road_clip.shp" ) def transform_coords (geometry ): """ 将路段坐标转换为 GCJ-02,并返回一个坐标序列 说明:若是 MultiLineString,这里仅返回每条子线的最后一个转换结果(简化) 实际数据中通常是 LineString,若为 MultiLineString 可按需展开 """ transformed_coords = [] if isinstance (geometry, MultiLineString): for line in geometry.geoms: part = [(round (wgs2gcj(x, y)[0 ], 5 ), round (wgs2gcj(x, y)[1 ], 5 )) for (x, y) in line.coords] transformed_coords = part return transformed_coords else : for (x, y) in geometry.coords: gx, gy = wgs2gcj(x, y) transformed_coords.append((round (gx, 5 ), round (gy, 5 ))) return transformed_coords
构建 NetworkX 图,写入“阴影长度”属性
然后我把路段逐段拆分,用 shapely 计算它们与阴影的相交长度,并写入 NetworkX 图的边属性。每条边有三个关键属性:总长度、阴影覆盖长度、权重。权重的定义取决于用户的偏好:
ShadowYorN=True -> 遮阴优先:最小化非阴影长度(len - intersection)
1
2
3
4
5
6
7
8
9
10
11
12
13
14
15
16
17
18
19
20
21
22
23
24
25
26
27
28
29
30
31
32
33
34
35
36
37
38
G = nx.Graph() def creatShadowG (ShadowYorN: bool ): G.clear() for _, row in roads.iterrows(): geometry = row['geometry' ] coords = transform_coords(geometry) line = LineString(coords) for i in range (len (line.coords) - 1 ): p0 = line.coords[i] p1 = line.coords[i + 1 ] seg = LineString([p0, p1]) intersection_len = seg.intersection(shadow_unions).length seg_len = seg.length if ShadowYorN: weight = seg_len - intersection_len else : weight = intersection_len n0 = str (p0) n1 = str (p1) G.add_edge( n0, n1, weight=weight, road_length=seg_len, shadow_length=intersection_len ) return G
路径指标计算与最短路求解
在得到一条路径后,统计整条路径的总长度与总阴影长度,并给出“覆盖率”作为反馈信息。
1
2
3
4
5
6
7
8
9
10
11
12
13
14
15
16
17
18
19
20
21
22
23
24
25
26
27
28
29
30
31
32
33
34
def calculate_path_attributes (G, path ): total_len = sum (G[u][v]['road_length' ] for u, v in zip (path[:-1 ], path[1 :])) total_shadow = sum (G[u][v]['shadow_length' ] for u, v in zip (path[:-1 ], path[1 :])) return total_len, total_shadow def cal_shadowRoad (start_node_str: str , end_node_str: str , ShadowYorN: bool ): """ 说明: - start_node_str / end_node_str 需是 NetworkX 图中节点的字符串形式,如 "(116.12345, 39.98765)" - 若想支持“任意经纬度点击”,可先把点 snap 到最近节点(见下方 find_nearest_node) """ G = creatShadowG(ShadowYorN) path = nx.shortest_path(G, source=start_node_str, target=end_node_str, weight='weight' ) total_len, total_shadow = calculate_path_attributes(G, path) if ShadowYorN: couverture = f"{int ((total_shadow / total_len) * 100 )} %" else : couverture = f"{100 - int ((total_shadow / total_len) * 100 )} %" path_list = [[float (v) for v in node.strip('()' ).split(',' )] for node in path] return path_list, couverture def find_nearest_node (G, point: Point ): nearest, dmin = None , float ('inf' ) for node in G.nodes: lng, lat = [float (v) for v in node.strip("()" ).split(", " )] d = great_circle((point.y, point.x), (lat, lng)).meters if d < dmin: dmin = d nearest = node return nearest
nx.shortest_path 以 weight 作为代价,天然适配“遮阴/晒阳”两套策略。路径指标只需沿边累加即可得出。
后端接口:返回路径与覆盖率
Flask 接口接收起终点节点字符串与策略(ShadowYorN),返回路径坐标和覆盖率。
1
2
3
4
5
6
7
8
9
10
11
12
13
14
15
16
17
from flask import Flask, request, jsonifyapp = Flask(__name__) @app.route('/get_shadowRoad' , methods=['GET' ] def get_shadowRoad (): start_str = request.args.get('start' ) end_str = request.args.get('end' ) shadow_flag = request.args.get('ShadowYorN' ) ShadowYorN = True if shadow_flag == 'true' else False shadowRoad_json, couverture = cal_shadowRoad(start_str, end_str, ShadowYorN) return jsonify({'shadowRoad' : shadowRoad_json, 'couverture' : couverture}) if __name__ == "__main__" : app.run(host="0.0.0.0" , port=5000 , debug=True )
前端绘制(高德地图 AMap)
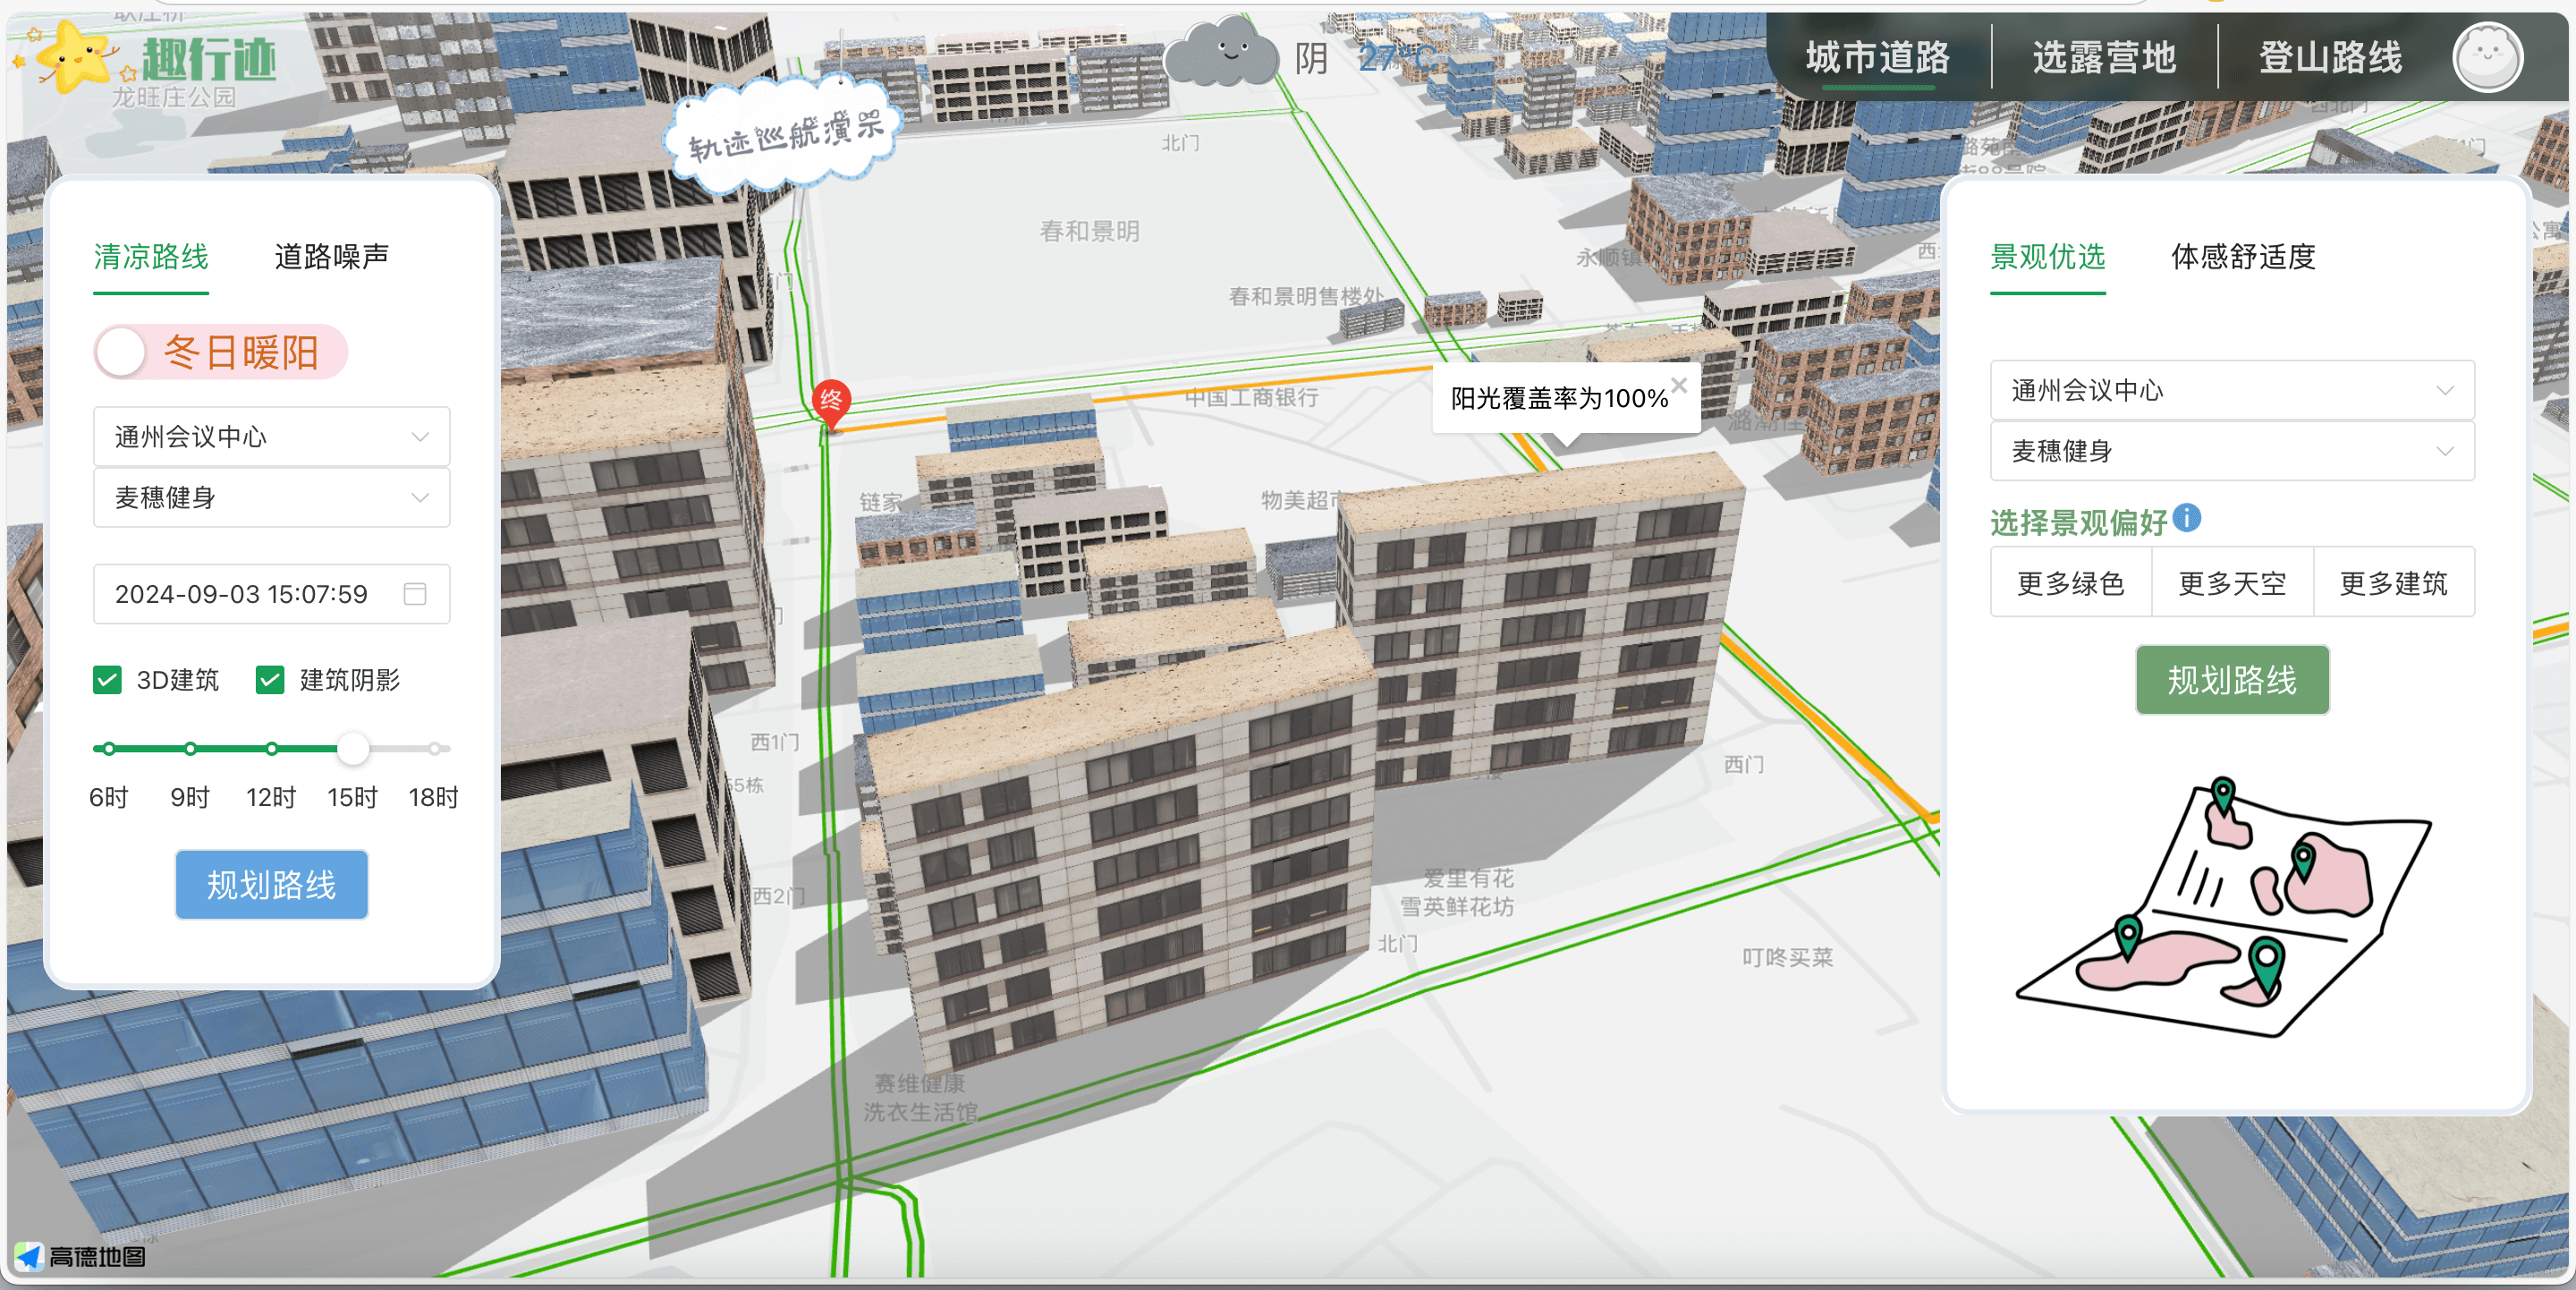
前端基于高德地图 API,使用 AMap.Polyline 绘制路径,并在路径中点弹出InfoWindow ,显示“阴影覆盖率”或“阳光覆盖率”。当用户切换策略时,会重新请求接口并刷新线路。
1
2
3
4
5
6
7
8
9
10
11
12
13
14
15
16
17
18
19
20
21
22
23
24
25
26
27
28
29
30
31
32
33
34
35
36
37
drawRoad() { axios.get(this.$apiHost + `/get_shadowRoad?start=${this.startValues}&end=${this.endValues}&ShadowYorN=${this.shadowChecked}`) .then((response) => { let path = []; response.data.shadowRoad.forEach(pt => { const [lng, lat] = pt; path.push([lng, lat]); }); const mid = Math.floor(path.length / 2); if (polyline) { map.remove(polyline); } polyline = new AMap.Polyline({ path: JSON.parse(JSON.stringify(path)), strokeWeight: 6, strokeColor: "orange", lineJoin: "round", }); polyline.setMap(map); const info = new AMap.InfoWindow({ offset: new AMap.Pixel(0, -30) }); if (this.shadowChecked) { info.setContent('阴影覆盖率为 ' + response.data.couverture); } else { info.setContent('阳光覆盖率为 ' + response.data.couverture); } info.open(map, path[mid]); map.setFitView([polyline], false, [60, 60, 60, 60], 18); this.showNavigating = 1; }); }
遮阴路线
阳光路线